Friday 24 February 2012

What we ate: Braised Lamb Shanks

We had one of my best friends over for dinner the other night.  It was actually supposed to be brunch but sick cats and little babies threw a wrench into our plans. Going from brunch to dinner was a bit of a scramble.  Baby A usually goes to bed at 6:30, and Keith and Amanda were bringing their baby for the visit. I didn't want to spend the night cooking so I wanted to have something I can do ahead.  This braised lamb shank was the perfect answer.  The slow braise makes the meat tender and moist.  The slow cooking breaks down the cartilage, collagen and fat and turns   Braising is a simple and easy one put meal.  It is typically highly economical since you would typically use tougher (less expensive) cuts of meat for braising.  You can get creative with different kinds of meat (chick, pork, beef, lamb), veggies (root vegetables, mushrooms, cabbage, artichoke), aromatics (cinnamon, star anise, fennel seeds), braising liquids (wine, stock) but the method and elements are always the same.   Braising is a slow building and layering of flavors.  It always starts with browning of the meat and forms the foundational flavor.  Add aromatics and spices and then a little liquid.  Always go low and slow - low heat, long time.  This braised lamb shank recipe is a great example on how to do this.  I serve this with a simple couscous side and green salad.


mise en place
Braised Lamb Shanks
4 lamb fore shanks
1 can diced tomatoes
1/2 cup golden raisins
1 cup red wine
4 cup of beef stock
1 medium onion thinly sliced
6 cloves of garlic finely chopped
Flour for dusting (season with salt and pepper)
Spice Rub (recipe below)

Pre-heat oven to 350 degrees
Rub a generous amount of the spice rub on each of the lamb shanks.
Dust each lamb shank with the seasoned flour.
Heat a heavy bottomed dutch oven (Le Crueset or something similar) to medium-high heat
Sear and brown the lamb shank, working in batches if necessary (don't crowd your pot)
A nice sear helps build flavor in the braise
Set the lamb shanks to the side, turn heat down to medium
Add onions and garlic into the pot and let this cook down and carmelize but don't let it burn (about 8 minutes)
Add in the raisins, remaining spice rub and diced tomatoes and let it cook for 3 minutes
Add in red wine and let it reduce for another 3-5 minutes
Keep building flavors with aromatics and reducing wine
Add in the beef stock and put the lamb shanks back into the pot
Cover with lid and put the whole pot into the oven and let it braise for 2 hours.
Remove from oven when done and let rest for 10 minutes before serving.
Optional - if you want to make this more refined, you can remove the lamb shanks, skim the braising liquid, put the braising liquid through a food mill and then put it through a fine sieve for a silky smooth sauce.


Spice Rub
1 tsp of coriander seeds
1 tsp of black peppercorns
1 tsp of fennel seeds

1 tsp of caraway seeds
1 tsp of cinnamon
3 tsp of kosher salt

Grind the first 4 ingredients together in a pestle and mortar
Mix in cinnamon and divide the spice mixture in half
Add salt to 1/2 of the spice mix and use that for rubbing the lamb shanks
Reserve the other 1/2 of the spice mix (without salt) and you will use this to put into the braise itself.

 I like to serve this family style with the dutch oven on the table.  We had a green salad and a couscous with raisins and almonds as a side.  Enjoy!


Couscous with toasted almonds and raisins
2 cups of prepared couscous (prepare your couscous either quick server or full grain as per preparation instructions)
1/4 cup of santana raisins
1/4 cup of almond slivers toasted
handful of fresh mint finely chopped
1/4 lemon wedge for juicing
olive oil

Fluff out couscous.
Top with almonds, raisins and chopped mint
Squeeze lemon juice on top and drizzle with olive oil
Mix at the table and serve with lamb.

Monday 20 February 2012

What we ate: Pan fried ocean perch, sauteed Kale and asapargus risotto

Much like pasta, rice also holds a special place in the heart of the Lo household.  Being Chinese, rice is what fuels me and keeps my blood flowing.  Rice is good anytime, for any meal and cooked in any way.  But admittedly, one of my favorite preparations of rice is not Chinese, but the Italian one.  Creamy smoth risotto perfumed with condiments and sharp parmigiano-reggiano.  I just love it.  There are a few misconceptions about risotto and hopefully this post will do away with some of your fears on making risotto.  First of all, it really doesn't take that much time to make, it should take no more than 18 minutes to al dente from beginning of cooking to the end.  That's all you need.  Second of all, you don't need to stand there and stir it constantly. Sure you need to stir occasionally and you need to keep an eye on it, but as long as you have a good heavy bottomed pan, you are golden.  Third, it should be silk smooth and relatively loose.  It should not be clumpy or thick or pasty.  If you serve it on a plate, the risotto should be loose enough to spread flat on the plate. Finely, use the right rice.  You want the short grain variety and something with a high starch content, which will help make your risotto nice and rich.  I commonly see people use arborio rice for risotto but I tend to stay away from that. I think Carnaroli is the best type of rice for risotto, or vialone nano is a very good rice as well, but it can overcook easily.

Risotto is very flexible and acts as a blank canvas.  You can change up the recipes very easily to make different kinds of risotto. You can use different flavored stocks, different veggies, different meats and even different juices (e.g. Chef Massimo Capri's beet juice risotto is a favorite). 

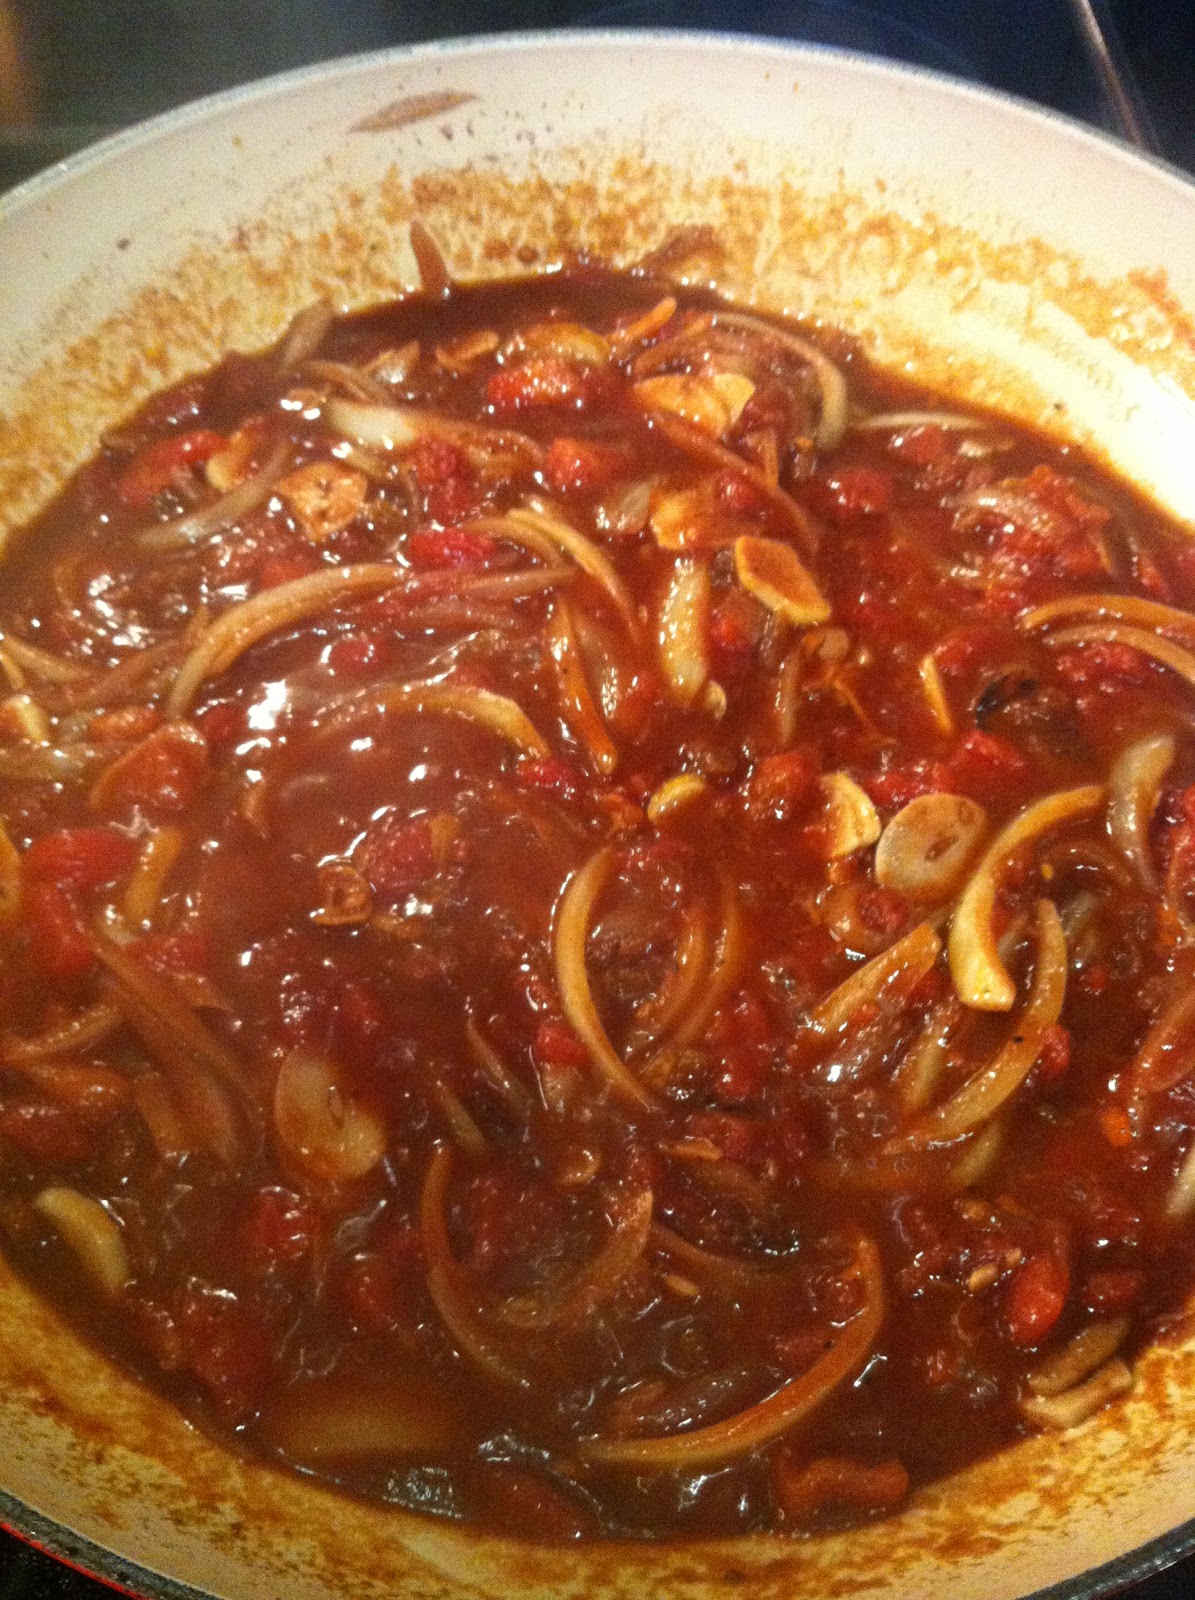
For this post, I have an asparagus risotto that's scented with lemon zest.  This is great served with fish and was a perfect accompaniment to the fresh ocean perch I bought at the market.  I sauteed some kale to complete the dish.

Asparagus Risotto
Half a bunch of asparagus, bottom inch of the stock removed (set aside and used for flavoring chicken stock) and cut into small pieces on a bias
2 shallots finely diced
1 cup of carnaroli rice
1 cup of dry white wine
3 cups of chicken stock
2 tablespoons of cold butter
1 cup of parmigiano-reggiano
zest of 1 lemon

Take the bottom 1 inch stocks of asparagus and add that to chicken stock and bring it to a boil, turn heat down but keep stock hot (this will help impart some asparagus flavor into the stock)
In heavy bottom pan (I use my Le Crueset dutch oven), heat to medium and add about a tablespoon of olive oil.
Add diced shallots and let it sweat out (cook to translucent but  don't let it burn).
Add carnaroli rice and let the olive oil coat each grain of rice, let it cook for a minute or 2 so the rice 'toasts'. 
Turn the heat up to medium-high, add the cup of white-wine and let the white cook down the rice.  Let it evaporate as this will infuse each grain with some white wine.
As wine evaporates, add a couple of ladles of stock and stir the rice a bit, let the stock cook down and evaporate.
Add more stock and continue the process for about 3 - 4 times (this process should take about 16 minutes from beginning to end)
Add your asparagus to the rice after the 3rd time you add stock.
Taste the rice for doneness.  It should have a bit of a bite in the middle (al dente). Then add one more ladle of stock for the last time to risotto so its nice and loose and turn the heat off (the risotto will cook with only residual heat the rest of the way).
Add the cup of cheese and lemon zest to the risotto and stir this vigorously (to whip air into the risotto and make it light and airy).  Risotto should be a bit loose, add a bit of stock if necessary. 
Add butter and continue to stir butter in vigorously until its all melted. (remember to use cold butter).
Risotto is done.

Pan fried Ocean Perch
4 small Ocean Perch fillets - drizzled with salt and pepper
1 tablespoon of capers
2 shallots thinly sliced
juice 1/2 lemon
tablespoon butter

Rinse perch fillets and pat dry with paper towels (make sure fish is very dry or it will stick)
Drizzle with olive oil and season with salt and pepper.
Heat heavy bottomed fry pan to medium-high
Add tablespoon of butter and tablespoon of olive oil (butter for flavor and oil to prevent butter from burning)
Make sure butter and pan is hot and add fillets skin side down first.
Fry for 3 minutes (don't fuss and move it around, let it fry as is)
Turn the fish over and fry for 3-4 minutes (total cooking time should be around 7-8 minutes)
Remove fish from the pan and set aside.
Add a bit more butter into the pan, add shallots and let the shallots soften and brown a bit.
Add capers and lemon juice, reduce this a bit and scoop shallots and pan juice on top of the fish fillets.

Sauteed Kale
1 bunch of kale - washed and roughly chopped
1/4 white wine
1 clove of garlic finely diced
1 pinch of red pepper flakes
1 anchovy chopped
olive oil

Heat olive oil in pan at medium-high heat
Add garlic, red pepper flakes, and anchovy and sautee for 30 seconds
Add kale and then deglaze pan with white wine
Sautee for 3 - 4 minutes until kale is cooked and softened.

The mise en place
Timing and plating:
The kale can wait a bit but fish and risotto should never have to sit and wait for each other.  These dishes are best served once its ready.  The key to this is having a properly prepped mise en place before you start cooking. Assemble all your ingredients.  Wash, chop and prep all your ingredients and have it all in once place.

I saute the Kale first and set it aside and keep it warm until its ready to be served.
Start with the the risotto and after the second filling of stock (about 10 minutes in) start cooking your fish.  Remember, its important to keep an eye on the risotto and stir occasionally, but it doesn't need constant attention.  The fish takes about 10 minutes from start to finish and should time out nicely with the risotto.  When you put the fish in the pan, don't touch it, let it fry, which gives you a few minutes to tend to the risotto.

This multi-tasking may take some practice but once you've done it a few times it becomes second nature. Once you've made your fair share of risotto, you'll get to know the timing and temperament of the dish and be able to work around it as you prepare other stuff. 

Enjoy!


Thursday 16 February 2012

Soup Time - Kale and White Bean Soup


I finish this with some grated Parmesan and drizzle of olive oil


Soup is definitely one of my favorite things to eat.  Soup is ubiquitous in the Chinese culture, and I can tell you with confidence that my mom has a soup for every ailment you can think of.  For me, soup is just comfort food.  It's food for the soul. It makes you feel warm and fuzzy inside.  It's fantastic to have a pot of soup in your fridge that you can eat throughout the week.  I was at the St Lawrence Market over the weekend and saw these beautiful ham hocks.  I knew right away they would be perfect for a soup.  I bought one and asked the butcher to cut into 4 smaller pieces. I used one for this soup and put the rest in the freezer for later use.

The mise en place
Ingredients:
Ham hock (1/4 piece, your butcher can cut it for you)
2 carrots - diced
2 stalks of celery - diced
1 medium onion - diced
3 sprigs of thyme
1 bay leaf
2 cups of dried white beans - soaked over night
1/2 bunch of Kale chopped finely
4 litres of water 


1) Heat a heavy bottomed pan to medium-high and add some olive oil. 

Let the veggies sweat but don't burn
2) Sweat carrots, onion and celery - saute until onion becomes translucent, but don't burn the vegetables (about 5-10 minutes)

3) Add ham hock, thyme, bay leaf and beans to the pot.  Cover with water and bring to a boil.

4) Lower heat and let it simmer gently for 45 minutes

5) Remove thyme stems, bay leaf and ham hock from pot.  Let ham hock cool down on the side. Let soup continue to simmer

6) Remove 1/3 of soup with beans and either puree with a hand blender or through a food processor.  Put the pureed soup back into the pot.

7) Remove meat from ham hock and finely chop this and add back into the soup.  Add chopped kale into the soup and let simmer for another 10 minutes.

8) Season with salt and pepper -Optional - grate some Parmesan cheese on top and serve.

Something to keep in mind is that I don't really measure things out nor do I cook off a recipe.  I do this by feel and when you are making this soup, use some discretion.  Watch and taste your soup.  There should be a good balance between broth and veggies/meat.  I generally like my soup to be 1/3 solids and 2/3 broth when the soup is done.  I also like to give my soup lots of time to simmer and let the flavors build.  That means I will ensure I have lots of liquid to start, knowing that I will let it simmer and reduce.  And finally the only time to season your soup is when its done.  If you add salt early in the process, the soup will just cook, reduce and get saltier the longer you cook the soup.  Season once and only at the very end.

Enjoy!


Tuesday 14 February 2012

Winner winner, chicken dinner - cleaning out my pantry

Fig and Goat Cheese Stuffed Chicken Breast with Balsamic Honey Reduction
Many of my most delicious creations come from cleaning out what I have in the fridge and pantry.  I find that my creativity works best when I have little structure in what I am going to do, but also constrained by what I have available to me.  This dish I did today is not so creative, but it was delicious and let me get rid of dried figs I had sitting in my fridge, half opened package of chevre I used for salad the day before and forced me to butcher the chicken I bought because I wanted to use the bones for stock.  So here it is: Fig and Goat Cheese stuffed Chicken Breast with Balsamic Honey Reduction.

Ingredients:
2 Skin on, boneless chicken breast
6-8 dried black mission figs - halved and stemmed
1 teaspoon of juniper berries
1 teaspoon of whole black peppercorns
2 cloves
1/2 cup balsamic vinegar
1/2 cup water
1 tablespoon of honey
1 tablespoon of butter
1 teaspoon of dijon mustard
1 cup chicken stock
salt and pepper
1/2 package of soft goat cheese (its about 4 tablespoons)

1) Put vinegar, water, cloves, juniper berries, peppercorns, honey into pot and bring to a boil.  Put figs into pot and let it gently simmer for 5 minutes.  Take the pot off the heat, cover and let it stand and cool for 30 minutes.

2) Preheat oven to 375 degrees.

3) Drain the figs and set to the side.  Pour poaching liquid through a sieve to remove any solid bits.  Put the pot of poaching liquid back on to the burner and add in the cup of chicken stock. Bring this to a boil and lower the heat to medium and let it continue to simmer and reduce until you are left with about 1/3 cup of sauce. (You can go to step 4 while you let this simmer, it will take awhile).  Once reduced to 1/3 of a cup, finish the sauce by whisking in 1 tablespoon of butter and dijon mustard. The sauce should thicken slightly and emulsify into a silky smooth reduction.

4) Slice a pocket into the chicken breast by cutting a horizontal cut along the thick side of the chicken breast.  Stick your finger in there and widen it to give yourself a 2 - 3 inch pocket inside the chicken breast.  Stuff each chicken breast with 2 tablespoons of goat cheese and half of the figs.  Season the whole chicken breast with salt and pepper.

5) Heat an oven-safe, heavy bottomed saute pan (i.e. cast iron skillet) to medium-high. Add olive oil and bring it up to heat.  Put chicken breast skin side down first.  Let it sear and brown (about 2 minutes).  Turn the chicken breast over and immediately put into pre-heated oven.  Bake for about 20 minutes or internal temperature reaches 165 degrees.  Take it out of the oven and let it rest for 5 minutes.


6) Serve with balsamic honey reduction.


This turned out really well for a brand new recipe. I'm sure many people have made a similar dish at some point but this was a good way to clean out stuff I already had and I will definitely add this to the repertoire. Hope you enjoy it as much as K and I did.

Thursday 9 February 2012

Go to meals: Pan Roasted Herb Chicken Breast

My mantra for go to meals is built on simplicity.  It has to be quick, has to be simple, has to be delicious and hopefully it's somewhat healthy.  So for this post, I give you my pan roasted herb chicken breast.  Depending on the mood, I may serve this with different veggies and starch but this week I decided to go with a nice mixed green salad with sunflower seeds, feta and raisins.  I use skin on, bone on chicken breast but you can definitely use skinless, boneless chicken breasts.  Personally I prefer to buy my chicken with skin and bones because its much cheaper and easy to de-bone and take the skin off.  It's also more flavorful with skin and bones and the skin acts as a self-basting mechanism.  (Did I just refer to skin as mechanism?  Just goes to show that I may know about food, but I won't ever make a living as a writer)

The flavor accelerators


Give your breast some herb love

Pan Roasted Herb Chicken
2 bone in, skin on, chicken breast
2 sprigs of Thyme - pull thyme off the stock and discard the stock
2 sprigs of Rosemary - pull rosemary off and chop finely, discard the stock
1 clove of garlic finely minced
zest of 1 lemon
1 tsp salt
1tsp pepper
3 tbsp olive oil

Mix thyme, rosemary, garlic, zest, olive oil, salt and pepper together to form a paste.
Rub paste into the chicken breast and let it marinate in the refrigerator for at least 2 hours
Pull chicken out of the fridge at least 30 minutes before cooking and let it rest to room temperature
Preheat oven to 375 degrees
Heat a cast iron skillet or oven proof heavy bottomed pan to medium-high heat
Add a bit of olive oil into the pan
Sear chicken skin side down for till it turns golden brown - 2-3 minutes
Flip chicken and immediately put into oven to roast for about 18 minutes (time may vary depending on size of chicken breast - internal temperature should be at least 165 degrees, but try not to overcook it as chicken breast gets real dry, real fast)
Take it out of oven and let it rest for at least 5 minutes before serving.

Mixed Green Salad
Spring Mix
Feta Cheese
Shredded Carrots
Sliced Red Onions
Sliced Celery
Cherry Tomatoes
Sliced Cucumbers
Raisins
Sunflower Seeds

Dressing
1 tsp Dijon Mustard
1 tsp Honey
1 tbsp White Wine Vinegar
1 tbsp EV Olive Oil
Salt and Pepper to taste

Combine all ingredients for dressing and whisk till it is all incorporated and emulsified.
Toss in with all salad dressing ingredients and serve. Enjoy!

Monday 6 February 2012

Go to meals: Meatballs

I have professed my love for eating and cooking Italian food many times over.  I know spaghetti and meatballs is not really all that 'traditional' but hey, its red sauce dining, North American style at its finest.  I usually make a  big pot of meatballs that we can eat through out the week on pasta or in a sandwich.  If I make too much, like I usually do, I will portion out and freeze for a easy weeknight dinner when time is tight.  I can tell you there is no better smell to fill your home with than this pot of meatballs slowly simmering away on a lazy Sunday afternoon.

 Meatballs
The mise en place
1/2 lb of ground veal
1/2 lb of ground pork
1/2 lb of ground beef
2 cloves of garlic finely chopped
1small onion finely chopped (cut really really small)
1 1/2 cup of italian style bread crumbs
1 cup of grated parmesan
1 large egg
1/4 cup olive oil
1 tsp salt
1tsp pepper

Tomato Sauce
2 cans of premium plum tomatoes (spend the extra $1 to get good canned tomatoes)
1 small onion - finely chopped
1 clove of garlic - finely chopped
basil

Start with the tomato sauce so it has time to simmer. 
Heat a large heavy bottom pot or dutch oven to medium heat (I use my 4 gallon Le Crueset)
Add onion and saute until it becomes translucent - don't brown
Add garlic and saute for 20 seconds - don't burn it
Add cans of tomatoes
You can crush tomato by hand before you add into pot for a more rustic sauce or use a hand blender to puree like I do.
Let sauce simmer on low while you make the meatballs.

For the meatballs I start by making a soffritto of sorts.  I put the finely chopped onions and garlic in a pan with olive oil. Cook onion and garlic in olive oil at medium-low heat for 10 minutes.  This will soften the onion and garlic, turn it translucent and carmelize a bit - don't burn it.


Set onion/garlic oil to the side and let cool.
In a large mixing bowl, add meat, bread crumbs, egg, salt, pepper, cheese, and onion/garlic oil.
Mix really well with hands until all ingredients are well mixed together.
Using a loose hand, form about a tablespoon of meat into small balls (stay light and don't press meatballs to hard)
 Once all meatballs are formed, brown meatballs in a skillet with a little oil in small batches.***
Once meatball has been browned, put directly in tomato sauce and let simmer for at least 45 minutes - 1 hour. I like to let it simmer on really low heat for a couple of hours so all the tomato sauce and meatballs cook nicely together. 


I finish with torn fresh basil in the sauce. Serve with pasta, on its own or in a meatball sub.


*** if you don't want to fry the meatballs, you can put meatballs on baking sheet and bake in a 375 degree oven for 20 minutes and then put them into the sauce to simmer.

Sunday 5 February 2012

What we ate: Saturday Night Steak Dinner

Being a full fledged carnivore, I eat my fair share of steaks.  I'm not really what you would call a 'steak and potatoes' guy (labels are so high school) but I do appreciate a nice slab of juicy beef here and there.  What I rarely do is eat steaks at a restaurant. I just wouldn't typically go out for a steak.  Why? Because honestly, most of the time the experience is underwhelming.  Don't get me wrong, there are many good steak restaurants in Toronto but the really good ones are on the expensive side and most of the other places for steak, are again, underwhelming.  Places like the The Keg isn't that bad but they aren't that good either.  So once in awhile I will get a treat and go to a fine steakhouse, but most of the time, I prefer to buy a really beautiful steak and do it right myself.  You gotta remember, a good steak starts with the meat itself.  There shouldn't be a lot of fussing around.  Don't get me wrong, I fully appreciate a beurre monte bath for a nice piece of steak resting to temperature, but we can't go with a butter poached steak everyday.  That being said, we decided Saturday night would be steak night and this time we are having a nice filet mignon.  My favorite cut is the bone-in rib steak but filet was on special so that's what we're having.  We also decided this would be a no starch night so we have 3 side non-carb side dishes to accompany our steak dinner.


The Steak:

Splurge a little and buy a nice cut of steak. The higher the grade, the more marbling you will find, which will give you a tastier and juicier steak.  Don't cook a steak straight from the refrigerator.  Let it rest to room temperature, this will give it a nice even cook.  I try and take it out of the fridge at least 30 minutes before I'm set to cook it and let it rest to room temperature. Just before I cook it, I will brush it with olive oil and season with fresh cracked pepper and salt.  I usually use this alderwood smoked sea salt because I like the smokey flavor it imparts, but kosher salt will work just fine.  Try to stay away from table salt - its too salty and lacks real flavor.  Since I'm in a condo, I cook my steak in my cast iron skillet.  Use a BBQ if you have it or any heavy bottom skillet will do.  Steaks should not be flipped over and over again.  It should cook on one side and flipped once to cook on the other side.  I had a couple of 8 ounce filets that were about an inch thick.  I like mine medium-rare.  For that, I had my skillet on medium high and cooked the steak 3 1/2 minutes on each side.  I take it off the heat and top it with a small piece of butter, tent it and let it rest for at least 5 minutes.  Resting the meat is important as it allows the fibres of the steak to relax and all the juices to redistribute through the steak rather than leech out if you cut it right away.

The 3 sides we had with dinner tonight were Brussel Sprouts sauteed with bacon, Sauteed portabello mushrooms and maple balsamic glazed beets with goat cheese.


Brussel Sprouts:
Trim brussel sprouts (about 10-12) and cut in half
Finely chop 1 clove of garlic
3 strips of bacon chopped


Blanch brussel sprouts in salted water for 2 minutes and drain
Brown bacon in saute pan at medium heat until golden brown but not crispy or burnt - add chopped garlic
Add brussel sprouts into pan with a tablespoon of water and toss
Let cook for about 2 minutes, season with pepper (it will be salty already from bacon and blanching)
Keep warm until ready to serve.

Sauteed Portabello Mushroom
4 portabello mushroom cut into half and then sliced
Finely chop 1 clove of garlic
1/4 of red wine
1 teaspoon of olive oil
1 tablespoon of butter (optional)

Heat skillet to medium-high heat
Add olive oil and garlic and let saute for 10 seconds, careful not to burn garlic
Add mushrooms and toss and sautee for 1 minute
Add red wine to de-glaze pan and toss - cook for 5 minutes until mushroom is soft and tender
finish with tablespoon of butter (optional), season with salt and pepper

Maple Balsamic Glazed Beets with Goat Cheese
This is one of my favorite side dishes of all time.  I love beets and I like them like this warm or cold.  This take some time so make in advance.

3 small/medium sized beets
1 tablespoon balsamic vinegar
1 tablespoon butter
1tablespoon maple syrup
olive oil
salt and pepper
Soft goat cheese

Wash beets and place in foil lined baking sheet - drizzle with olive oil and season with salt and pepper and bake in 375 degree oven for 60 minutes then let beets cool.
Peel and slice beets into half disc slices (or however you want to cut them).
Melt tablespoon of butter in a pan at medium-high heat
Add beats to butter, toss and add maple syrup and balsamic vineger
Let beets cook for about 5 minutes - you should see a nice glaze form over the beats
Season with salt and pepper
Let beets cool down for 10 minutes (you want to serve it warm, not hot. its also good cold)
Top with small pieces of soft ripened goat cheese.


It was a fantastic steak dinner in the comfort of my home while we watched the Leafs lay a beating on Ottawa.  Oh so gratifying in so many ways.


Thursday 2 February 2012

Go to meals - Spaghetti Carbonara

Pasta is a natural go to meal in the Lo household.  K loves pasta and so do I.  Its quick, its simple and its so damn good.  When I say quick and simple, I don't mean Primo Pasta and Sauce folks. Making a good pasta is not that difficult.  Fresh ingredients, don't overcook the pasta, keep it simple and finish with love.

So without further ado - here's what we had last night before I got some time away from the family at the ACC to watch the Leafs beat the Penguins.  Spaghetti Carbonara is one of our favorites at home.  I say at home because too many restaurants in North America has butchered this dish with cream.  I take a more traditional approach to my Carbonara but do add deviate a bit from tradition by adding onions but I love the sweetness it brings.
The mise en place
Ingredients to serve 4 - Cut recipe in half to serve 2
1 500g package of spaghetti - I personally always use Barilla No. 5 spaghetti
1/2 lb of sweet pancetta - dice this into small cubes
1 small onion - diced to same size as pancetta
1/2 cup of grated parmigiano reggiano
1/2 cup of graded pecorino romano
2 large eggs -beaten

Note on the cheese: I like using half parmigiano and half pecorino and since these are staples in my home, its easy to do.  If you don't want to fuss and buy two kinds of cheese, you can use a full cup of either or.  If you are using only one, I would suggest pecorino romano.  I also freshly grate my cheese from a block so it comes out a little looser and thus 1/2 cup each.  If you use the pre-grated stuff from the store (still the real cheese, not the fake Kraft stuff), its much denser and you will likely need to use less (e.g. 1/4 cup of each or 1/2 cup total).

The steps:
1.  Mix cheese with egg - this should turn into a pasty thick mixture

2. Bring a large pot of water to a boil and generously salt this
3. Warm up a large saute pan to medium-high heat
4. Put the spaghetti into pot of water to boil - this will take 8 minutes to al dente (for the pasta I use, check instructions if you use some other kind)
5. Put a tablespoon of olive oil into saute pan and add pancetta - brown for 2 minutes
6. Add diced onions into saute pan and cook with pancetta until softened - about 5 minutes - turn the heat off (this is important -because we don't want the egg mixture to cook and scramble when we add it)


7. Spaghetti should be done now, drain spaghetti (IMPORTANT - keep pasta water as this will help us make sauce) and add this into saute pan with pancetta and onions
8. Add the egg and cheese mixture into the pan (remember there should be no direct heat, only residual heat)
 
 9. Toss and mix spaghetti while adding a scoopful of pasta water. The egg and cheese should start dissolving with the pasta water.  Keep mixing, tossing and adding more water until a silky smooth but not watery sauce forms

Pasta is now done.  Serve with a green salad for a simple and quick weekday meal.  Some keys to remember, the egg and cheese mixture is key to this recipe, you want it to melt and emulsify, not cook.  Remember to take it off direct heat and let the residual heat 'cook' the sauce.  Pasta water is a crucial part of the sauce, make sure you have left enough of it to make the sauce.  Getting the sauce to the right consistency may take some practice.  It should look creamy, silky and smooth with all the cheese, egg and pasta water emulsified into one sauce.  Hope you enjoy!

The finished product